1 # 首先从 Anaconda 官网下载 anaconda Linux 64Bit 版本命令行安装包
 2 $ wget https://repo.continuum.io/archive/Anaconda3-5.2.0-Linux-x86_64.sh
 3
 4 # 修改权限让脚本可以运行
 5 $ chmod +x Anaconda3-5.2.0-Linux-x86_64.sh
 6
 7 # 运行该安装脚本
 8 $ ./Anaconda3-5.2.0-Linux-x86_64.sh


 9
10 # 剩下就是一路Yes或者Enter好了...
11
12 Welcome to Anaconda3 5.2.0 (by Continuum Analytics, Inc.)
13
14
15 In order to continue the installation process, please review the license
16
17 agreement.
18
19 Please, press ENTER to continue
20 >>>
21
22 # 重新加载一下 bash 就可以使用 `conda` 命令了
23 $ source ~/.bashrc
24
25 #然后尝试一下运行 `conda -V` 命令行看是否已经安装成功,如果返回对应的版本信息,则说明安装成功。
26
27 $ conda -V
28 conda 4.2.13

 一、更新 conda 命令:conda update -n base conda
 二、安装 Scrapy 命令:conda install scrapy
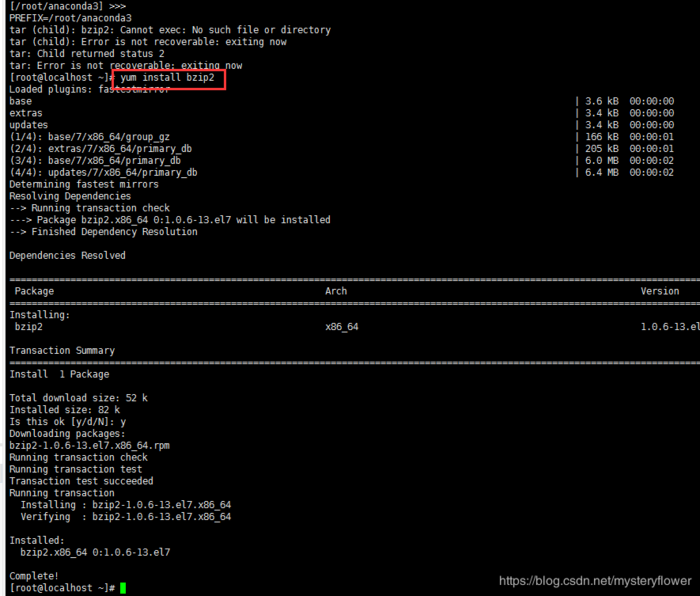
2、遇到问题:tar (child): bzip2: Cannot exec: No such file or directory
tar (child): bzip2: Cannot exec: No such file or directory
tar (child): Error is not recoverable: exiting now
tar: Child returned status 2
tar: Error is not recoverable: exiting now
—————————————

解决方法很简单,只要安装bzip2就行了,yum安装的命令如下:
yum -y install bzip2

参考网址:https://blog.csdn.net/mysteryflower/article/details/93064195
如果:centos7安装scrapy error: command ‘gcc’ failed with exit status 1 执行以下命令:
1 yum install gcc libffi-devel python-devel openssl-devel如果重装 Anaconda3 需要执行以下命令:
1 出现问题:ERROR: File or directory already exists: /root/anaconda3
2
3 解决方案:删除即可 rm -rf /root/anaconda3相关文章
标签:服务器技术
- •VMware Workstation Pro 16安装CentOS7超详细图文步骤
- •CentOS7下配置使用JumpServer 堡垒机 (图文教程)
- •CentOS安装jdk的几种方法及配置环境变量方式
- •CentOS忘记密码修改方案以及centos卡在开机登录界面,命令失效的解决方法
- •解决笔记本安装centos7后无法调节屏幕亮度
- •VMware安装CentOS 8.1(CentOS 8系列可参考)的图文详细教程
- •CentOS7下搭建JumpServer
- •CentOS7 minimal 最小化安装网络设置过程
- •CentOS安装rpm包出现冲突时的解决办法
- •Vmware下CentOS7最小化安装方式


