1、安装和配置必须的依赖
sudo yum install curl policycoreutils openssh-server openssh-clients

sudo systemctl enable sshd

sudo systemctl start sshd

sudo yum install postfix

sudo systemctl enable postfix

sudo systemctl start postfix

sudo firewall-cmd --permanent --add-service=http

sudo systemctl reload firewalld
2、去清华大学镜像站下载gitlab的rpm安装包
https://mirrors.tuna.tsinghua.edu.cn/gitlab-ce/yum/el7/

yum install -y policycoreutils-python

rpm -i gitlab-ce-11.0.0-ce.0.el7.x86_64.rpm
如图表示安装成功
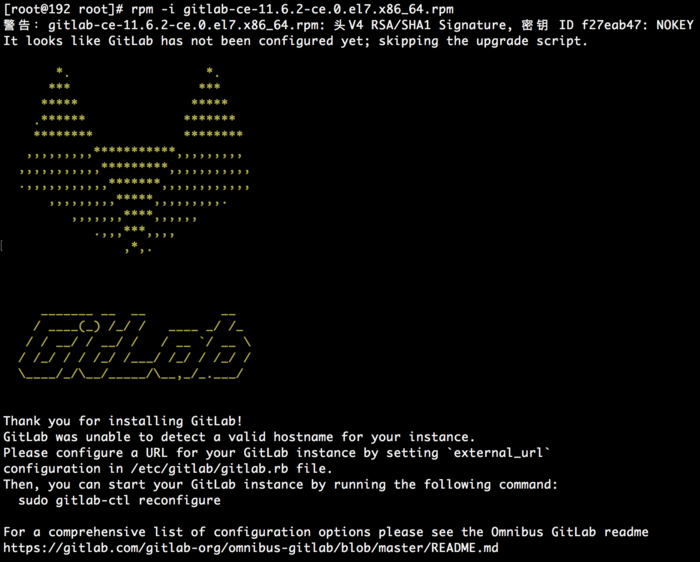
3、修改gitlab配置文件指定服务器ip和自定义端口
vim /etc/gitlab/gitlab.rb

firewall-cmd –zone=public –add-port=8088/tcp –permanent
ps:注意这里设置的端口不能被占用,默认是8080端口,如果8080已经使用,请自定义其它端口,并在防火墙设置开放相对应得端口
4.重置并启动GitLab
gitlab-ctl reconfigure
gitlab-ctl restart(可省略)
浏览器访问http://192.168.6.139:8088
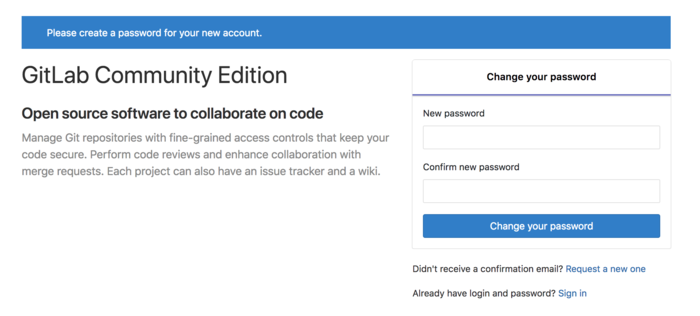
首次登陆,需要设置root的密码
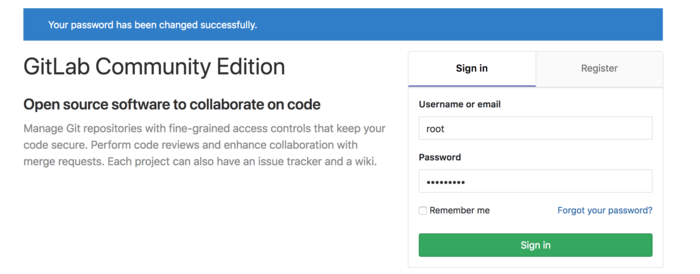
登陆后新建组和项目
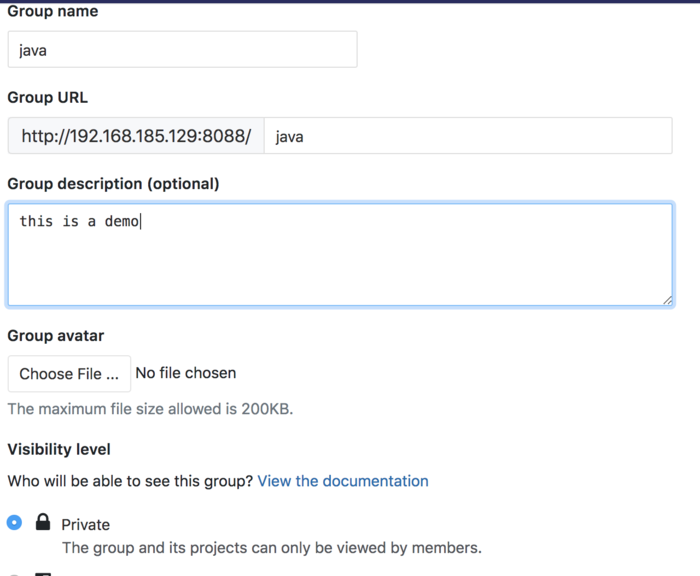
安装客户端gitlab-ci-multi-runner
curl -L https://packages.gitlab.com/install/repositories/runner/gitlab-ci-multi-runner/script.rpm.sh | sudo bash如果出现尝试其他镜像提示 可以ctrl+c 终止掉进程,然后更改镜像地址
vim /etc/yum.repos.d/runner_gitlab-ci-multi-runner.repo将一下内容替换runner_gitlab-ci-multi-runner.repo原有的内容
[gitlab-ci-multi-runner]

name=gitlab-ci-multi-runner

baseurl=http://mirrors.tuna.tsinghua.edu.cn/gitlab-ci-multi-runner/yum/el7

repo_gpgcheck=0

gpgcheck=0

enabled=1

gpgkey=https://packages.gitlab.com/gpg.key
执行 yum install -y gitlab-ci-multi-runner 即可
注册runner
gitlab-ci-multi-runner register
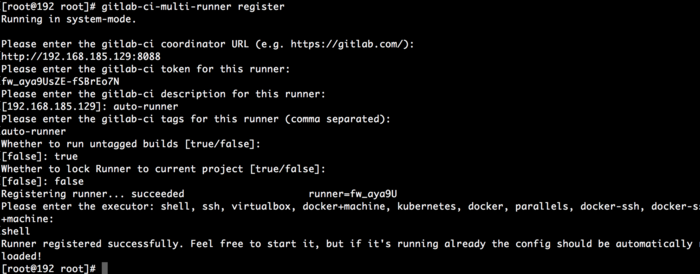
刷新项目,查看runner是否成功启动,如图,绿色为启动成功
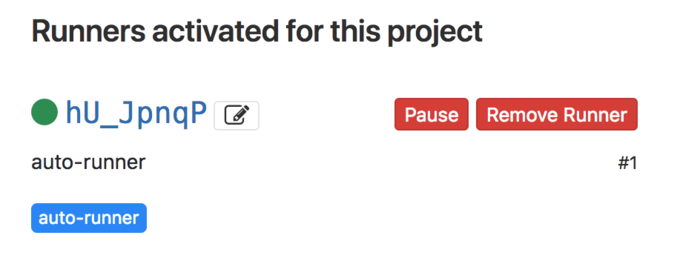
查看runner状态
gitlab-ci-multi-runner verify

重启所有runner:
gitlab-ci-multi-runner run重启单个runner:
gitlab-ci-multi-runner run-single --url http://IP:port/ --token runnerToken --executor shell编写 deploy文件
在gitlab-runner的~/.local/bin/目录下新建deploy文件
su gitlab-runner

mkdir ~/.local/bin -p

cd ~/.local/bin

vim deploy
复制以下内容到deploy文件
#!/bin/bash

if [ $# -ne 3 ]

then

      echo "arguments error!"

      exit 1

else

      deploy_path="/data/wwwroot/$1/$2/$3"

      if [ ! -d "$deploy_path" ]

      then

              git clone "git@192.168.6.139:${1}/${2}.git" $deploy_path

      cd $deploy_path

              git checkout $3

      else

              cd $deploy_path

              git pull

      fi

fi
以上脚本的意思是如果参数不是三个,打印参数错误
如果目录没建立 这git clone 并且git checkout
如果存在 则git clone
添加脚本执行权限
chmod +x ~/.local/bin/deploy
切换到root身份 编辑/etc/profile文件 最末尾添加加入 path路径
PATH=”$HOME/.local/bin:$PATH”
source /etc/profile
给gitlab-runner用户创建文件权限
chown -hR gitlab-runner:gitlab-runner /data/wwwroot
配置ssh登录
su gitlab-runner

mkdir  ~/.ssh

cd   ~/.ssh

ssh-keygen
然后一直按enter
查看id_rsa.pub文件 并复制 ssh key
创建一个gitlab-runner用户,并将该用户添加到项目成员中(赋予该成员maintainer角色)
在gitlab上,登录gitlab-runner
将刚刚复制的ssh key设置到gitlab-runner用户的ssh-keys上
创建文件 .gitlab-ci.yml 和test.txt ,前者用于CI/CD解析,后者用于触发CI/CD
yml 内容如下
stages:

  - deploy


deploy1:

  stage: deploy

  tags:

    - test-runner-1

  only:

    - master

  script:

    - bash deploy java test-project master
修改test.txt文件,查看ci/cd 功能是否触发
此时任务可能会报以下错误
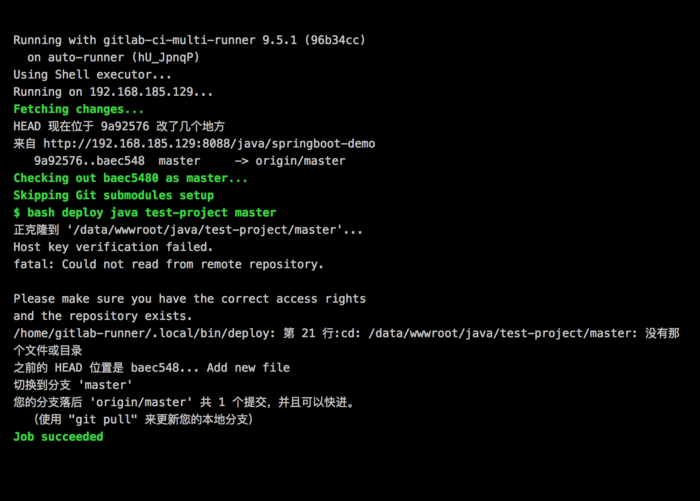
root身份下 执行以下命令
source /etc/profile
ln -s /home/gitlab-runner/.local/bin/deploy /usr/bin/deploy切换
su gitlab-runner

deploy java test-project master
根据提示 填入yes 就可以了
至此就完成了ci的功能
将tomcat和jdk都放到wwwroot目录下,并给gitlab-runner赋予权限
修改配置文件
vim /etc/profile
在文件末尾加上
export JAVA_HOME=/data/wwwroot/jdk

export PATH=$JAVA_HOME/bin:$PATH

export CLASSPATH=.:$JAVA_HOME/lib/dt.jar:$JAVA_HOME/lib/tools.jar

export TOMCAT=/data/wwwroot/tomcat

export PATH=$TOMCAT/bin:$PATH
修改.gitlab.yml配置为
stages:

  - deploy

  - build

  - ops


deploy_job:

  stage: deploy

  tags:

    - test-project

  only:

    - master

  script:

    - bash deploy java taozugong-service master

build_job:

  stage: build

  tags:

    - test-project

  only:

    - master

  script:

    - source /etc/profile

    - cd /data/wwwroot/java/taozugong-service/master

    - /data/wwwroot/maven/bin/mvn clean package -Dmaven.test.skip=true

ops_job:

  stage: ops

  tags:

    - test-project

  only:

    - master

  script:

    - rm -f /data/wwwroot/tomcat/webapps/taozugong.war

    - cp /data/wwwroot/java/taozugong-service/master/taozugong-service/target/taozugong.war /data/wwwroot/tomcat/webapps/taozugong.war

    - rm -f /data/wwwroot/tomcat/webapps/admin.war

    - cp /data/wwwroot/java/taozugong-service/master/taozugong-admin/target/admin.war /data/wwwroot/tomcat/webapps/admin.war
至此完成
还需要解决一下gitlab绑定的nginx与自己安装的nginx的冲突
# 复制一份 gitlib 下的 nginx
mv /opt/gitlab/embedded/sbin/nginx /opt/gitlab/embedded/sbin/nginx2

# 修改启动脚本
vi /opt/gitlab/sv/nginx/run
exec chpst -P /opt/gitlab/embedded/sbin/nginx -p /var/opt/gitlab/nginx
# 改为
exec chpst -P /opt/gitlab/embedded/sbin/nginx2 -p /var/opt/gitlab/nginx其实就是修改了 gitlab 的 nginx 进程名来防止冲突。
最后 reboot 即可。
- •VMware Workstation Pro 16安装CentOS7超详细图文步骤
- •CentOS7下配置使用JumpServer 堡垒机 (图文教程)
- •CentOS安装jdk的几种方法及配置环境变量方式
- •CentOS忘记密码修改方案以及centos卡在开机登录界面,命令失效的解决方法
- •解决笔记本安装centos7后无法调节屏幕亮度
- •VMware安装CentOS 8.1(CentOS 8系列可参考)的图文详细教程
- •CentOS7下搭建JumpServer
- •CentOS7 minimal 最小化安装网络设置过程
- •CentOS安装rpm包出现冲突时的解决办法
- •Vmware下CentOS7最小化安装方式


